
The first time I unwrapped one of these from the fridge, I genuinely gasped. There it was. this impossibly neat little cylinder, fruit leather hugging creamy cheesecake like they were always meant to be together. That is the magic of Cheesecake Fruit Roll-Ups, and I am still a little mad I did not think of it sooner.
My grandmother used to hide strawberry fruit leather in her purse for us grandkids. We would nibble them on car rides, sticky fingers and all. Making this recipe took me right back to that backseat, except now there is actual cheesecake involved, which feels like the upgrade my eight-year-old self deserved.
I have been on a bit of a cheesecake kick lately. these strawberry cheesecake donuts started it, honestly. and this might be my favorite riff yet. Let me walk you through what makes it work.
Why Fruit Leather and Cream Cheese Are the Unexpected Pairing
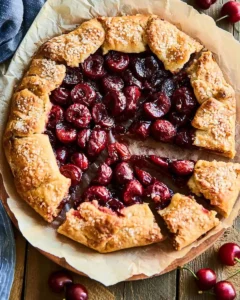
The ingredient list here is short, but every single thing earns its place. The fruit leather is not just a wrapper. it adds this intense, concentrated fruit flavor that cuts through the richness of the filling. I use the flat sheets, not the rolled strips, because you need enough surface area to actually roll without tearing. The cream cheese needs to be genuinely soft, not just “room temperature for ten minutes” soft. I learned that the hard way when my first batch had tiny lumps that refused to smooth out. A little powdered sugar helps the filling set just enough to hold its shape, and a splash of vanilla makes the whole thing taste like actual cheesecake, not just sweetened cream cheese. If you want to see how fruit and pastry can play together in other ways, this blueberry galette taught me a lot about balancing tart and creamy.

How to Make Cheesecake Fruit Roll-Ups
You start by beating the cream cheese until it looks like thick frosting, which takes longer than you think. a full three minutes on medium speed. The smell of vanilla hitting the warm cream cheese is one of those small kitchen joys I never tire of. Then you spread this mixture across the fruit leather, leaving a bare border so it does not squish out when you roll. Here is where patience matters: roll slowly, tucking tight from the first turn, using the parchment or plastic underneath to guide you. I refrigerate the log for at least an hour, which feels like forever but transforms the texture completely. The cold firms everything up so you can slice clean rounds without smearing. When you cut through and see those neat little spirals, it feels like you have done something far more complicated than you actually have. For another no-bake cheesecake project that plays with texture, these strawberry cheesecake bites use a similar chill-and-set method I love.
What I Learned After Three Batches of These
The first time I made Cheesecake Fruit Roll-Ups, I tried to rush the chilling step. The slices collapsed into sad, creamy puddles. Now I set a timer and walk away.
Not all fruit leather is created equal. The thick, pliable kind from the natural foods aisle works; the thin, brittle stuff from the dollar store tears and cracks when you roll.
If your cream cheese is even slightly cold, you will fight lumps forever. I microwave mine in ten-second bursts until it yields completely to the spatula.
My Secret Trick: Dip your knife in hot water and wipe it dry between every single slice. The heat glides through the cold filling without dragging, and you get those bakery-perfect clean edges that make people think you bought them.

How to Store Cheesecake Fruit Roll-Ups
- Refrigerate in an airtight container with parchment between layers for up to 4 days
- Keep at 40°F or below. the cream cheese filling is perishable
- Freeze whole unsliced logs wrapped tightly in plastic then foil for up to 1 month
- Thaw frozen rolls overnight in the refrigerator, never at room temperature
- Slice just before serving for the cleanest presentation
Why These Work as a Lighter Dessert Option
Cheesecake Fruit Roll-Ups manage to feel indulgent without the heaviness of a full slice of cheesecake. The fruit leather contributes natural sweetness and actual fruit content, while the portion size stays controlled by the rolling method. Each piece is satisfying in a way that does not leave you needing a nap. I have served these after heavy dinners when no one wanted a full dessert plate, and they disappeared faster than anything else on the table.

FAQs
Can I use homemade fruit leather?
Yes, absolutely. I have made these with homemade strawberry fruit leather from my dehydrator, and the flavor was incredible. Just make sure your homemade version is fully dried and pliable, not sticky or brittle. Thickness matters more than anything. aim for about 1/8 inch so it rolls without cracking.
Why did my filling ooze out when I sliced?
Your roll needed more chilling time. I know the temptation to cut early, but the cream cheese mixture needs at least an hour, preferably two, to firm up properly. Also check that you left a clean border when spreading. filling right to the edge guarantees overflow.
What fruits work best for the leather?
Strawberry and raspberry are my favorites for their tartness against the sweet filling. Mango works beautifully for a tropical version. Avoid anything too mild like pear or apple. the filling will overwhelm it. The fruit flavor needs to stand up to the cream cheese.
Can I make these ahead for a party?
These are actually ideal for making ahead. I prep the rolls the night before, keep them unsliced and wrapped tightly, then slice just before guests arrive. Cheesecake Fruit Roll-Ups hold their shape beautifully for several hours once cut if kept chilled.


Cheesecake Fruit Roll-Ups
Ingredients
Equipment
Method
Notes
Conclusion
I hope you make these Cheesecake Fruit Roll-Ups soon and feel the same little spark of surprise I did when they actually worked. They are the kind of recipe that looks fancy, tastes nostalgic, and comes together with almost no effort. For another no-bake cheesecake adventure, this pineapple version has been on repeat at my house all summer.
Follow us on Social Media : Pinterest