
There’s something truly magical about the moment a slice of Key Lime Cheesecake is placed before you, its creamy texture promising a burst of tangy-sweet joy. It’s that perfect balance of zesty lime cutting through a rich, velvety filling atop a crumbly graham cracker crust – a dessert that instantly brings a smile. For me, these are more than just flavors; they’re cherished memories, like those golden afternoons spent perfecting the crust for our key lime pie bars in my grandmother’s kitchen, the scent of lime filling the air.
I remember my daughter, Lily, her tiny hands eager to help zest the limes, her eyes wide with wonder as we poured the creamy mixture into the crust. It’s those shared moments, blending generations of baking traditions, that make every dessert so special.
This Key Lime Cheesecake recipe is designed to bring that same warmth and ease into your home. It’s comforting, relatively low-stress to prepare, and a fantastic way to create new family traditions. My practical tip for today: always make sure your cream cheese is at room temperature for that truly smooth, lump-free filling!
What You Need to Make This Recipe
Crafting this delightful Key Lime Cheesecake calls for simple, fresh ingredients that really shine, like the bright Key lime juice and zest, the rich cream cheese, and that essential sweetened condensed milk for creamy perfection. It reminds me of the simple pleasure of making our family’s key lime pie bars, where every ingredient plays a vital role in creating that signature tangy-sweet balance. You’ll find the full list of measurements in the recipe card below.

How to Make Key Lime Cheesecake
Making this Key Lime Cheesecake is a beautiful journey from simple ingredients to a stunning dessert. You’ll start by pressing the buttery graham cracker crust into your pan, just like building the foundation for any great dessert, much like the preparations for a traditional King Cake. Then comes the luscious Key lime filling, baked gently until set, and finally, a good long chill to achieve that perfect, firm texture. It’s a process that truly rewards patience.
Pro Tips for Making This Key Lime Cheesecake
Over years of baking, I’ve gathered a few cherished secrets that make all the difference, especially when it comes to a delicate dessert like Key Lime Cheesecake. Here’s what works best for me:
- For a Smooth Filling: Always, always make sure your cream cheese is completely softened to room temperature. This is key to preventing lumps and achieving that silky-smooth filling we all adore. I usually take mine out a few hours before I plan to bake.
- The Zest is Best: Don’t skip the Key lime zest in the filling! It intensifies that bright, floral lime flavor more than just the juice alone. My top tip is to zest your limes before juicing them.
- Preventing Cracks: Cheesecakes can be a bit finicky, but a water bath is your best friend. It creates a humid environment in the oven, helping the cheesecake bake evenly and preventing those tell-tale cracks on top.
- My Secret Trick: My secret for the perfect set is simple: don’t overbake! The Key Lime Cheesecake should still have a slight jiggle in the center when you take it out. It will continue to set as it cools, giving you that wonderfully creamy consistency.

How to Store Key Lime Cheesecake
Proper storage is essential to keep your Key Lime Cheesecake tasting fresh and delicious. Once fully cooled, I always store any leftover slices or the entire cheesecake in an airtight container in the refrigerator. It will stay wonderfully fresh for up to 5 days. If you’re planning ahead, you can also freeze slices for up to a month; just wrap them tightly in plastic wrap and then foil. When you’re ready to enjoy, simply thaw them in the fridge overnight. My personal tip: always let it come to room temperature for about 15-20 minutes before serving to truly appreciate its creamy texture and vibrant flavors.
Nutritional Benefits
While desserts are often about indulgence, this Key Lime Cheesecake still offers a little something extra. With its real Key lime juice, you’re getting a touch of Vitamin C, and the dairy provides some calcium. It’s a lovely balance, reminding us that homemade sweets can be a delightful part of family life without losing that special touch.

FAQs
Can I use regular lime juice instead of Key lime juice?
While you technically can, I highly recommend using authentic Key lime juice for this Key Lime Cheesecake. Key limes have a distinct aromatic tartness that’s sweeter and more floral than regular limes, which makes a significant difference in the signature flavor of the cheesecake. It’s worth seeking out!
How do I prevent my cheesecake from cracking?
The best way to prevent cracks in your Key Lime Cheesecake is to bake it in a water bath. This helps maintain a moist, even baking environment. Also, avoid overbaking and allow it to cool slowly, first in the oven with the door ajar, then on a wire rack, and finally, chilling it thoroughly in the refrigerator.
Can I make this Key Lime Cheesecake ahead of time?
Absolutely! This Key Lime Cheesecake is an excellent make-ahead dessert. I often prepare it a day or two in advance. It needs at least 6 hours to chill and firm up properly, but a full overnight chill truly allows the flavors to meld and the texture to become perfectly creamy and set.
What are some good garnishes for Key Lime Cheesecake?
For garnishes, I love a dollop of fresh whipped cream, a few thin slices of Key lime, or some extra Key lime zest for a burst of color and flavor. Sometimes, a sprinkle of toasted coconut or a few fresh berries can also beautifully complement the tangy profile of the Key Lime Cheesecake.
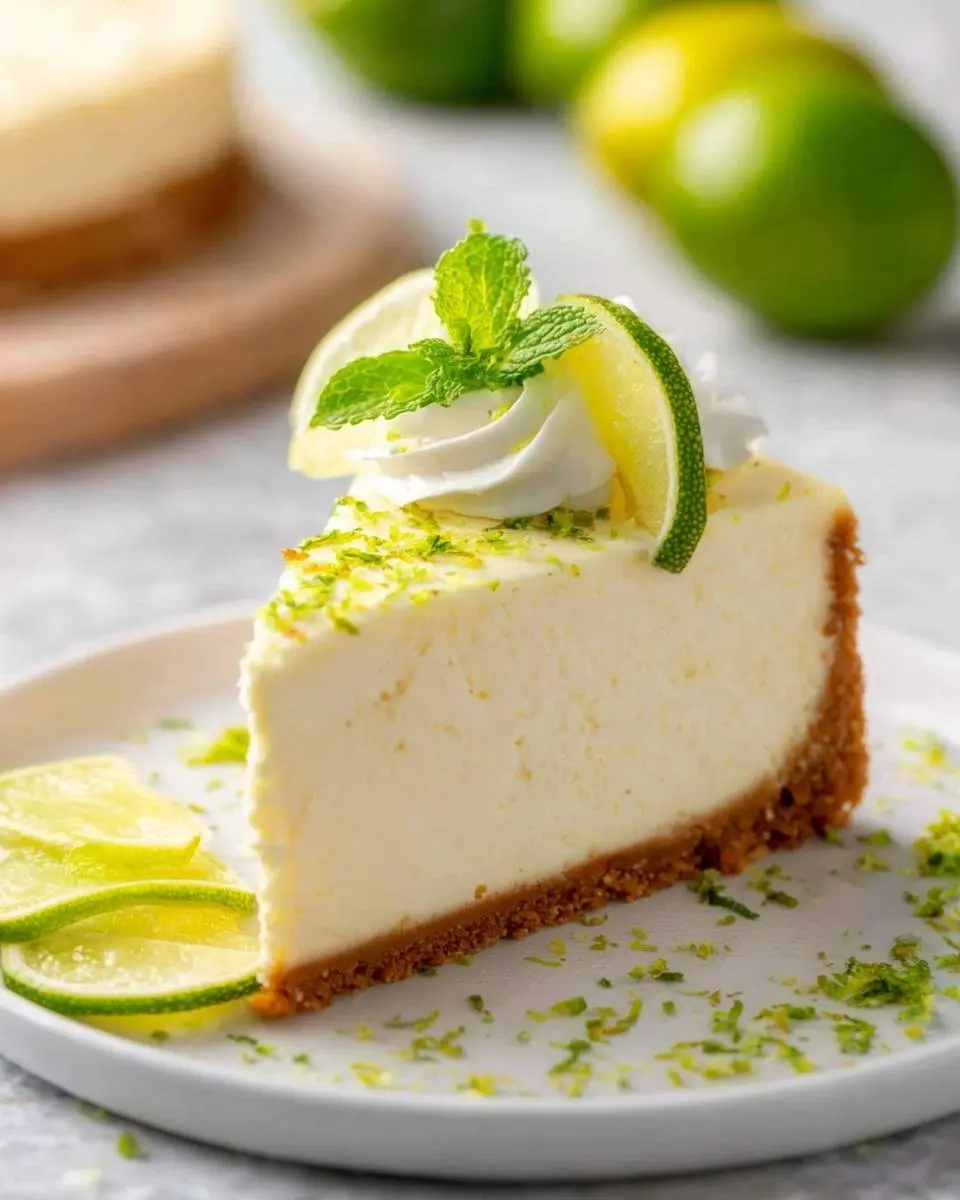

Zesty Key Lime Cheesecake
Ingredients
Equipment
Method
Notes
Conclusion
This Key Lime Cheesecake is more than just a recipe; it’s an invitation to create cherished moments and share a truly delicious dessert with your loved ones. From its zesty tang to its creamy indulgence, it’s a simple pleasure that reminds me of the joy found in every homemade treat, whether it’s this or a delightful Pink Velvet Cake. So gather your family, preheat that oven, and let the aroma of this incredible cheesecake fill your home with warmth and happiness.