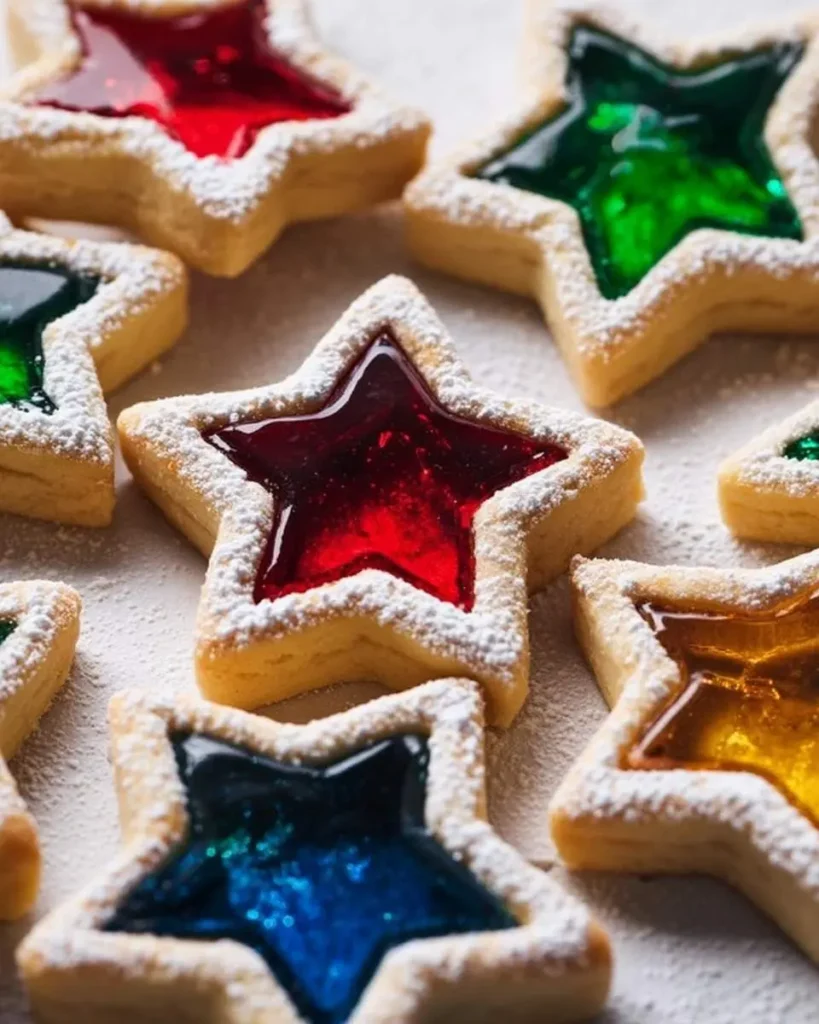
I remember the first time I made these Stained glass cookies; the kitchen filled with the warm, buttery scent of baking cookies and the sweet aroma of melting candy. It was pure Christmas magic. Every year since, seeing those jewel-toned centers glowing in the oven has become a core memory of my holiday season. They taste like a simple, perfect butter cookie, but with a delightful crunchy candy center that makes them so special. They have the classic charm of my Cranberry Orange Shortbread Cookies but with a whimsical, sparkling twist.
What Makes This Stained glass cookies So Special?
What I adore most about this recipe is its beautiful simplicity. The ingredient list is wonderfully straightforward—butter, sugar, egg, vanilla, and flour—creating a cookie that is tender, flavorful, and the perfect frame for the candy center. While the 90-minute prep time seems like a lot, most of it is just hands-off chilling time! The quick 12-minute bake means I can whip up several batches for gifting. These Stained glass cookies are more than a treat; they’re a creative holiday project.
Ingredient Notes for Stained glass cookies
The magic of these cookies lies in a few key components. I always use unsalted butter because it gives me full control over the saltiness, resulting in a richer, purer flavor. For the “glass,” any colorful hard candies like Jolly Ranchers work beautifully. Just be sure they’re translucent to get that glowing effect! The base dough is wonderfully reliable, much like the one I use for my Christmas Sugar Cookie Bars.


Classic Stained Glass Cookies
Ingredients
Equipment
Method
Notes
How I Make Stained glass cookies
Bringing these cookies to life is my favorite part. I start by creaming the butter and sugar until it’s pale and fluffy—this is my secret to a tender cookie every time. After chilling the dough, the real fun begins. I roll it out and use two cookie cutters, one large and one small, to create a frame. Then, I fill the center with crushed candy. Watching that candy melt and bubble in the oven is a truly joyful moment, transforming them into beautiful edible ornaments.

My Tips for the Perfect Outcome
- Don’t Skip the Chill: Chilling the dough is essential to prevent the cookies from spreading too much during baking.
- Crush Candy Finely: Crush the candies into small, uniform pieces, but not into a powder, for even melting.
- Cool Completely: Let the cookies cool completely on the baking sheet. This allows the candy center to harden properly before you move them.
How I Serve and Store This Dish
I absolutely love hanging these on our Christmas tree as edible ornaments! Just be sure to poke a small hole in the top of the dough before baking. They also look stunning arranged on a holiday platter for guests to admire before devouring. To store your Stained glass cookies, I keep them in an airtight container at room temperature, with sheets of parchment paper between the layers to prevent them from sticking together. They’ll last for about a week.
What is the best candy to use for stained glass cookies?
I’ve found the best results come from hard, translucent candies like Jolly Ranchers or Life Savers. They melt into a beautiful, clear, glass-like center with vibrant colors. I would avoid opaque or filled candies, as they don’t create that classic stained glass effect and can sometimes burn or bubble unevenly.
Why did the candy centers in my stained glass cookies crack?
Cracking usually happens if the cookies cool down too quickly or if they’re moved from the baking sheet before the candy has fully set. To prevent this, I always let my Stained glass cookies cool completely on the hot baking sheet on a wire rack, allowing the candy to harden gradually and evenly.
Can I make the cookie dough ahead of time?
Yes, absolutely! This dough is fantastic for making ahead, which is a lifesaver during the busy holiday season. I often prepare the dough, wrap it tightly in plastic wrap, and refrigerate it for up to three days. You can also freeze the dough disk for up to a month for even more flexibility.
How do you crush the hard candies without making a huge mess?
My go-to method is simple and clean. I first separate the candies by color into individual heavy-duty zip-top bags. Then, I place a bag on a cutting board and gently tap it with a rolling pin or the flat side of a meat mallet until the candies are crushed into small, even pieces.
Conclusion
This recipe holds such a special place in my holiday traditions, and I hope it brings as much sparkle and joy to your kitchen as it does to mine. Making these Stained glass cookies is a beautiful experience from start to finish. If you try them, I would love to hear how they turned out!