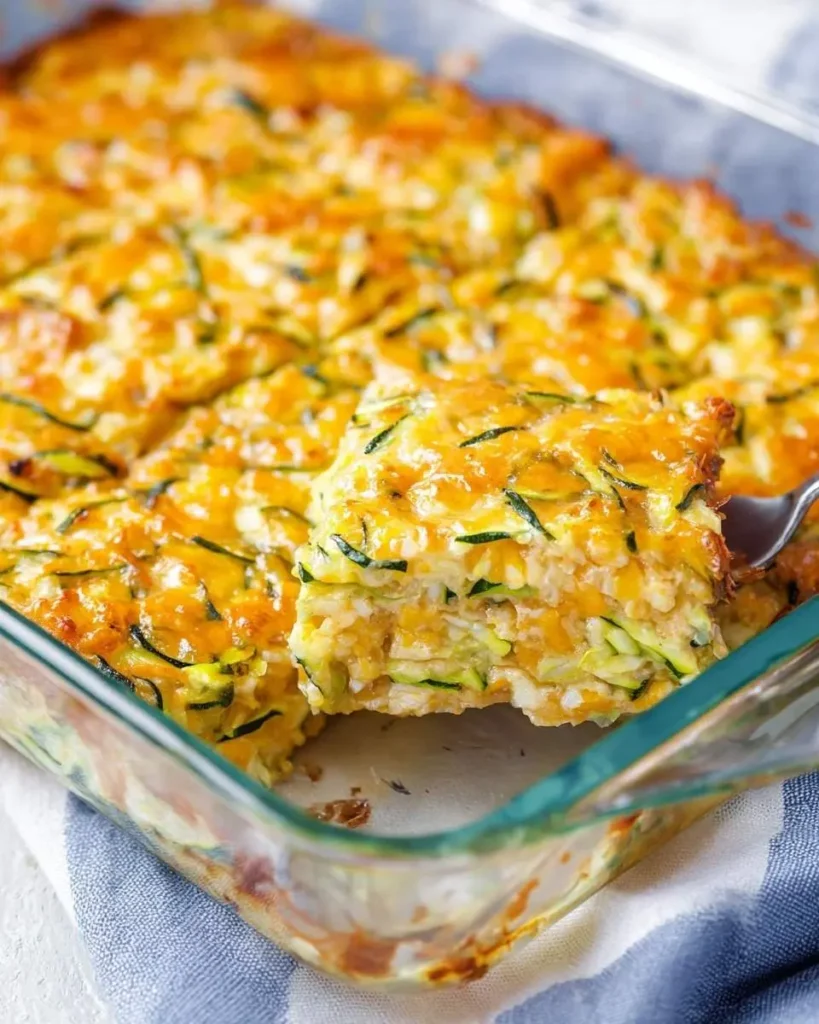
I remember the first time I made this Creamy Parmesan Zucchini Casserole. The aroma of garlic and cheese filled my kitchen, instantly making the house feel more like a home. It’s more than just a recipe to me; it’s a warm hug on a plate. This dish has the comforting, nostalgic feel of my favorite hashbrown casserole, but with a touch of elegance that makes any meal feel special. The combination of tender zucchini, a luxuriously creamy sauce, and that golden, crunchy topping is pure magic.\n\n## My Favorite Things About Zucchini Casserole\nWhat I adore most about this Zucchini Casserole is how it delivers such impressive flavor with minimal fuss. With just 20 minutes of prep and 30 minutes of cook time, it’s my go-to for weeknight dinners and potlucks alike. The ingredients are simple, but they come together beautifully—the nutty Gruyère and sharp Parmesan create a sauce that feels incredibly decadent, transforming humble zucchini into the star of the show. It’s a dish that proves comfort food can also feel a little fancy.\n\n## What Goes Into My Favorite Zucchini Casserole\nFor this Zucchini Casserole, I always choose firm, smaller zucchini for the best texture. The real secret, however, is using both Gruyère and Parmesan cheese. Gruyère melts into a beautifully smooth, nutty sauce that reminds me of the richness in a great seafood Alfredo casserole, while Parmesan adds a sharp, salty bite.\n\n\n\n \n\n\n\n
Emma
Protein-Packed Greek Yogurt Bark
This refreshing and easy-to-make bark is loaded with protein, healthy fats, and antioxidants, making it the perfect guilt-free snack or light dessert. It's customizable with your favorite toppings!
2cupsplain Greek yogurt0% or 2% fat, high protein variety recommended
1scoopvanilla protein powderor unflavored
2tbsphoneyor maple syrup, adjust to taste
Toppings
1/2cupmixed berriesfresh or frozen (e.g., blueberries, raspberries), chopped if large
1/4cupchopped almondsor other nuts like pistachios or walnuts
1tbspchia seedsoptional, for extra fiber and omega-3s
Equipment
Baking Sheet
Parchment Paper
Large mixing bowl
Spatula or Offset Spatula
Method
Prepare the Base
Line a large baking sheet (approximately 10x15 inches or similar) with parchment paper. This will prevent the bark from sticking and make it easy to remove.
In a large mixing bowl, combine the Greek yogurt, protein powder, and honey (or maple syrup). Mix thoroughly until all ingredients are well combined and the mixture is smooth, with no lumps of protein powder. Taste and adjust sweetness if desired.
Spread and Top
Pour the yogurt mixture onto the prepared baking sheet. Using a spatula or an offset spatula, spread the mixture evenly into a thin layer, about 1/4 to 1/2 inch thick. Try to make it as uniform as possible for even freezing.
Evenly sprinkle the mixed berries, chopped almonds, and chia seeds over the yogurt layer. You can gently press them down into the yogurt slightly to ensure they adhere.
Freeze and Serve
Carefully transfer the baking sheet to the freezer. Freeze for a minimum of 2-3 hours, or until the bark is completely solid and firm.
Once frozen, remove the baking sheet from the freezer. Lift the parchment paper with the frozen bark off the sheet. Break the bark into approximately 10 irregular pieces with your hands, or use a sharp knife to cut it into more uniform shapes.
Serve immediately. For best results, consume within 15-20 minutes after removing from the freezer, as it will start to soften.
Notes
Store any leftover Greek yogurt bark in an airtight container or freezer bag in the freezer for up to 2-3 weeks. This bark is highly customizable; feel free to experiment with other toppings like shredded coconut, mini chocolate chips, granola, different nuts, or a drizzle of nut butter after it's frozen.
\n\n## How I Make Zucchini Casserole\nBringing this dish to life is a simple, three-step process I truly enjoy. First, I prepare the zucchini by slicing it and giving it a quick sauté with onion and garlic to build that initial layer of flavor. Next, I whisk together the creamy cheese sauce right on the stovetop until it’s velvety and smooth. The final step is my favorite: assembling it all in a baking dish, which feels as satisfying as layering my classic ground beef and rice casserole. A generous sprinkle of buttery Panko breadcrumbs goes on top before it’s baked to golden perfection.\n\n\n\n \n\n\n\n## My Secrets for Success with Zucchini Casserole\n* Don’t skip salting the zucchini. This step is crucial for drawing out excess water and preventing a soggy casserole.\n* Shred your own cheese. Pre-shredded cheeses have anti-caking agents that can make your sauce gritty.\n* Toast the Panko. For an extra crispy topping, I briefly toast the Panko breadcrumbs in butter before sprinkling them on top.\n\n## How I Serve and Store This Dish\nI love serving this casserole warm from the oven, garnished with a sprinkle of fresh parsley to add a pop of color and freshness. It’s fantastic as a side dish with grilled chicken or fish, but it’s also hearty enough to be the main event for a vegetarian meal. Leftovers are a treat! I store them in an airtight container in the refrigerator for up to three days. To reheat, I recommend popping it back in the oven to help that Panko topping get crispy again.\n\n### Can I prepare this Zucchini Casserole in advance?\nAbsolutely! I often assemble the entire casserole without the Panko topping a day ahead. Just cover it tightly and refrigerate. When you’re ready to eat, sprinkle the buttered Panko on top and bake as directed, adding a few extra minutes to the cook time to ensure it’s heated all the way through.\n\n### Why did my zucchini casserole turn out watery?\nThis is a common issue, and it almost always comes down to the zucchini’s high water content. The most important step to prevent a watery zucchini casserole is to slice, salt, and let the zucchini rest for about 15-20 minutes. This process, called sweating, draws out a surprising amount of liquid. Be sure to pat it dry before cooking.\n\n### What can I use instead of Gruyère cheese?\nWhile Gruyère gives this dish its signature nutty and creamy flavor, you can definitely substitute it if needed. I’ve had great success using other good melting cheeses like Fontina, white cheddar, or even Gouda. Just be sure to choose a cheese that you enjoy the flavor of, as it’s a prominent part of this Zucchini Casserole.\n\n### Is it possible to add protein to this dish?\nYes, this recipe is very adaptable! If I want to make it a more complete one-pan meal, I sometimes stir in shredded rotisserie chicken, cooked ground turkey, or even some crispy bacon bits into the cheese sauce before assembling the casserole. It adds a delicious savory element that complements the creamy zucchini perfectly.\n\nThis recipe holds a special place in my heart, and I truly hope it brings as much joy to your table as it does to mine. If you try this Zucchini Casserole, I’d absolutely love to hear what you think and see your creations in the comments below!\n\nFollow us on Social Media : Facebook and Pinterest

 \n
\n

 \n
\n